動画プレイヤー UI
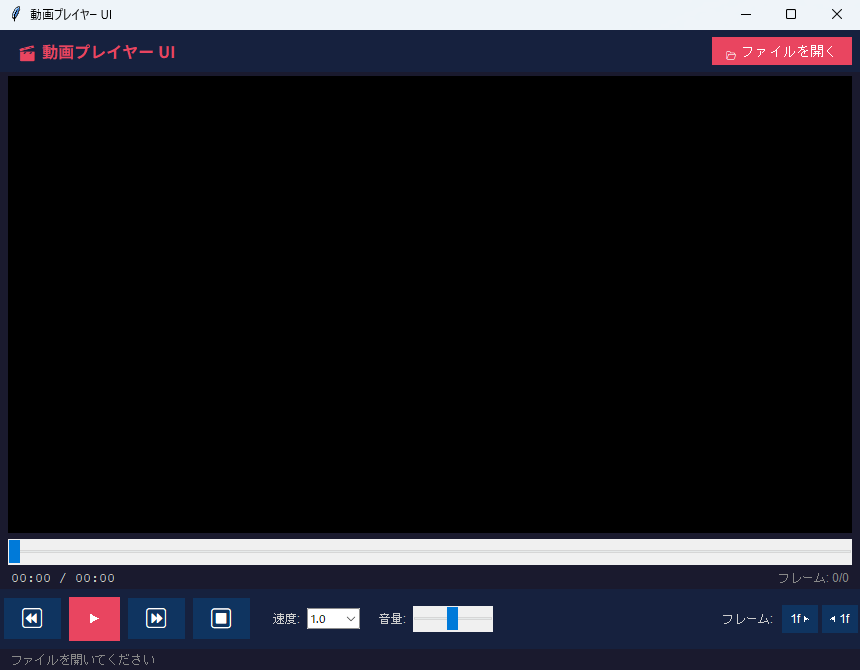
動画ファイルを再生・一時停止・シーク・コマ送り・速度変更できるプレイヤーUI(音声なし)。opencv-pythonとPillowの組み合わせを学びます。
1. アプリ概要
動画ファイルを再生・一時停止・シーク・コマ送り・速度変更できるプレイヤーUI(音声なし)。opencv-pythonとPillowの組み合わせを学びます。
このアプリは中級カテゴリに分類される実践的なGUIアプリです。使用ライブラリは tkinter(標準ライブラリ)・opencv-python・Pillow で、難易度は ★★★ です。
このアプリは「メディア処理」カテゴリです。画像・音声・動画を扱う領域は Python の強力なライブラリ群が活きる分野で、メディア処理の作法は他の用途にも応用が効きます。tkinter(標準ライブラリ)・opencv-python・Pillow を活かして実装するこの構造は、他のアプリにも応用が効きます。
完成形を見てから細部の解説に進む流れが効果的です。実行→気になる箇所を解説で確認→自分の手で改造、というサイクルで定着が早まります。
カスタマイズ章では具体的な拡張アイデアを示しています。一つ実装するごとに動作確認することで、変更が予期せぬ副作用を起こさないかも体感できます。
2. 機能一覧
- 「📂 ファイルを開く」ボタン(
_open_file())・「⏪」ボタン(_skip())・「▶」ボタン(_toggle_play())・「⏩」ボタン(_skip())・「⏹」ボタン(_stop())・「◀ 1f」ボタン(_step_frame())・「1f ▶」ボタン(_step_frame())で操作 filedialog.askopenfilename()によるファイル選択ダイアログmessagebox.showerror()・messagebox.showinfo()によるダイアログ通知- ウィンドウはタイトル「動画プレイヤー UI」・サイズ 860x640 で起動
3. 事前準備・環境
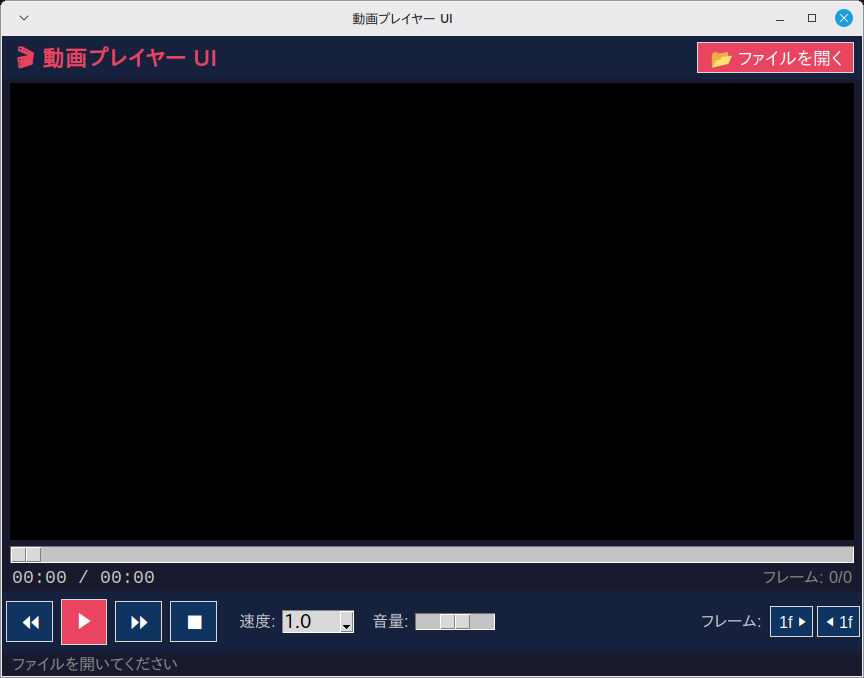
Python 3.10 以上 / Windows 11(実機)で起動・基本操作を確認 / Linux Mint 22.3(仮想マシン)で起動・画面表示を確認(macOS は未検証)
Windows 11(実機)で起動と基本操作を確認しています(全機能の網羅テストではありません)。Linux Mint 22.3(仮想マシン)では起動と画面表示を確認しました。macOS は必要なライブラリ(pip install)を入れれば動作する想定ですが、未検証です。
- Python 3.10 以上
- OS: Windows 11(実機で起動・基本操作を確認)・Linux Mint 22.3(仮想マシンで起動・画面表示を確認)
インストールが必要なライブラリ
pip install pillow4. 完全なソースコード
右上の「コピー」ボタンをクリックするとコードをクリップボードにコピーできます。
import tkinter as tk
from tkinter import ttk, messagebox, filedialog
import os
import threading
import time

try:
    import cv2
    CV2_AVAILABLE = True
except ImportError:
    CV2_AVAILABLE = False

try:
    from PIL import Image, ImageTk
    PIL_AVAILABLE = True
except ImportError:
    PIL_AVAILABLE = False


class App46:
    """動画プレイヤー UI"""

    def __init__(self, root):
        self.root = root
        self.root.title("動画プレイヤー UI")
        self.root.geometry("860x640")
        self.root.configure(bg="#1a1a2e")
        self._cap = None
        self._playing = False
        self._total_frames = 0
        self._current_frame = 0
        self._fps = 30
        self._volume = 0.5
        self._after_id = None
        self._build_ui()

    def _build_ui(self):
        # ヘッダー
        header = tk.Frame(self.root, bg="#16213e", pady=6)
        header.pack(fill=tk.X)
        tk.Label(header, text="🎬 動画プレイヤー UI",
                 font=("Noto Sans JP", 12, "bold"),
                 bg="#16213e", fg="#e94560").pack(side=tk.LEFT, padx=12)
        tk.Button(header, text="📂 ファイルを開く",
                  command=self._open_file,
                  bg="#e94560", fg="white", relief=tk.FLAT,
                  font=("Arial", 10), padx=10, pady=3,
                  activebackground="#c23152", bd=0).pack(side=tk.RIGHT, padx=8)

        if not CV2_AVAILABLE:
            tk.Label(self.root,
                     text="⚠ opencv-python が未インストールです "
                          "(pip install opencv-python Pillow)。",
                     bg="#fff3cd", fg="#856404", font=("Arial", 9),
                     anchor="w", padx=8).pack(fill=tk.X)

        if not PIL_AVAILABLE:
            tk.Label(self.root,
                     text="⚠ Pillow が未インストールです (pip install Pillow)。",
                     bg="#fff3cd", fg="#856404", font=("Arial", 9),
                     anchor="w", padx=8).pack(fill=tk.X)

        # ビデオ表示キャンバス
        self.canvas = tk.Canvas(self.root, bg="black", highlightthickness=0)
        self.canvas.pack(fill=tk.BOTH, expand=True, padx=8, pady=4)
        self.canvas_img = None

        # シークバー
        seek_f = tk.Frame(self.root, bg="#1a1a2e")
        seek_f.pack(fill=tk.X, padx=8, pady=2)
        self.position_var = tk.DoubleVar(value=0)
        self.seek_bar = ttk.Scale(seek_f, from_=0, to=100,
                                   variable=self.position_var,
                                   orient=tk.HORIZONTAL,
                                   command=self._on_seek)
        self.seek_bar.pack(fill=tk.X)

        # 時間表示
        time_f = tk.Frame(self.root, bg="#1a1a2e")
        time_f.pack(fill=tk.X, padx=8)
        self.time_label = tk.Label(time_f, text="00:00 / 00:00",
                                    bg="#1a1a2e", fg="#ccc",
                                    font=("Courier New", 10))
        self.time_label.pack(side=tk.LEFT)
        self.frame_label = tk.Label(time_f, text="フレーム: 0/0",
                                     bg="#1a1a2e", fg="#888",
                                     font=("Arial", 9))
        self.frame_label.pack(side=tk.RIGHT)

        # コントロールパネル
        ctrl_f = tk.Frame(self.root, bg="#16213e", pady=8)
        ctrl_f.pack(fill=tk.X)

        btn_s = {"bg": "#0f3460", "fg": "white", "relief": tk.FLAT,
                 "font": ("Arial", 12), "padx": 12, "pady": 4,
                 "activebackground": "#1a4a80", "bd": 0}

        self.rewind_btn = tk.Button(ctrl_f, text="⏪",
                                     command=lambda: self._skip(-10),
                                     bg="#0f3460", fg="white", relief=tk.FLAT,
                                     font=("Arial", 14), padx=10, pady=4,
                                     activebackground="#1a4a80", bd=0)
        self.rewind_btn.pack(side=tk.LEFT, padx=4)

        self.play_btn = tk.Button(ctrl_f, text="▶",
                                   command=self._toggle_play,
                                   bg="#e94560", fg="white", relief=tk.FLAT,
                                   font=("Arial", 16), padx=14, pady=4,
                                   activebackground="#c23152", bd=0)
        self.play_btn.pack(side=tk.LEFT, padx=4)

        self.forward_btn = tk.Button(ctrl_f, text="⏩",
                                      command=lambda: self._skip(10),
                                      bg="#0f3460", fg="white", relief=tk.FLAT,
                                      font=("Arial", 14), padx=10, pady=4,
                                      activebackground="#1a4a80", bd=0)
        self.forward_btn.pack(side=tk.LEFT, padx=4)

        tk.Button(ctrl_f, text="⏹",
                  command=self._stop,
                  bg="#0f3460", fg="white", relief=tk.FLAT,
                  font=("Arial", 14), padx=10, pady=4,
                  activebackground="#1a4a80", bd=0).pack(side=tk.LEFT, padx=4)

        # 再生速度
        tk.Label(ctrl_f, text="速度:", bg="#16213e", fg="#ccc",
                 font=("Arial", 9)).pack(side=tk.LEFT, padx=(16, 4))
        self.speed_var = tk.DoubleVar(value=1.0)
        self.speed_cb = ttk.Combobox(ctrl_f, textvariable=self.speed_var,
                                      values=[0.25, 0.5, 0.75, 1.0, 1.25, 1.5, 2.0],
                                      state="readonly", width=5)
        self.speed_cb.pack(side=tk.LEFT)
        self.speed_cb.set("1.0")

        # 音量(ダミー UIとして表示)
        tk.Label(ctrl_f, text="音量:", bg="#16213e", fg="#ccc",
                 font=("Arial", 9)).pack(side=tk.LEFT, padx=(16, 4))
        self.vol_var = tk.IntVar(value=50)
        ttk.Scale(ctrl_f, from_=0, to=100, variable=self.vol_var,
                   orient=tk.HORIZONTAL, length=80).pack(side=tk.LEFT)

        # フレームステップ
        tk.Button(ctrl_f, text="◀ 1f",
                  command=lambda: self._step_frame(-1),
                  bg="#0f3460", fg="white", relief=tk.FLAT,
                  font=("Arial", 9), padx=6, pady=4,
                  activebackground="#1a4a80", bd=0).pack(side=tk.RIGHT, padx=2)
        tk.Button(ctrl_f, text="1f ▶",
                  command=lambda: self._step_frame(1),
                  bg="#0f3460", fg="white", relief=tk.FLAT,
                  font=("Arial", 9), padx=6, pady=4,
                  activebackground="#1a4a80", bd=0).pack(side=tk.RIGHT, padx=2)
        tk.Label(ctrl_f, text="フレーム:", bg="#16213e", fg="#ccc",
                 font=("Arial", 9)).pack(side=tk.RIGHT, padx=4)

        # ファイル情報
        info_f = tk.Frame(self.root, bg="#1a1a2e")
        info_f.pack(fill=tk.X, padx=8)
        self.info_var = tk.StringVar(value="ファイルを開いてください")
        tk.Label(info_f, textvariable=self.info_var,
                 bg="#1a1a2e", fg="#888", font=("Arial", 9)).pack(anchor="w")

        self.root.protocol("WM_DELETE_WINDOW", self._on_close)

    def _open_file(self):
        path = filedialog.askopenfilename(
            filetypes=[("動画ファイル", "*.mp4 *.avi *.mov *.mkv *.wmv *.flv"),
                       ("すべて", "*.*")])
        if path:
            self._load_video(path)

    def _load_video(self, path):
        if not CV2_AVAILABLE or not PIL_AVAILABLE:
            messagebox.showerror("エラー",
                                 "opencv-python と Pillow が必要です:\n"
                                 "pip install opencv-python Pillow")
            return
        self._stop()
        if self._cap:
            self._cap.release()
        cap = cv2.VideoCapture(path)
        if not cap.isOpened():
            messagebox.showerror("エラー", "動画ファイルを開けませんでした")
            return
        self._cap = cap
        self._fps = cap.get(cv2.CAP_PROP_FPS) or 30
        self._total_frames = int(cap.get(cv2.CAP_PROP_FRAME_COUNT))
        self._current_frame = 0
        w = int(cap.get(cv2.CAP_PROP_FRAME_WIDTH))
        h = int(cap.get(cv2.CAP_PROP_FRAME_HEIGHT))
        duration = self._total_frames / self._fps
        self.seek_bar.configure(to=self._total_frames)
        self.root.title(f"動画プレイヤー — {os.path.basename(path)}")
        self.info_var.set(
            f"{os.path.basename(path)}  |  {w}×{h}  |  "
            f"{self._fps:.1f}fps  |  {self._fmt_time(duration)}")
        # 最初のフレームを表示
        self._show_frame(0)

    def _show_frame(self, frame_idx):
        if not self._cap:
            return
        frame_idx = max(0, min(frame_idx, self._total_frames - 1))
        self._cap.set(cv2.CAP_PROP_POS_FRAMES, frame_idx)
        ret, frame = self._cap.read()
        if not ret:
            return
        self._current_frame = frame_idx
        # BGR → RGB
        frame_rgb = cv2.cvtColor(frame, cv2.COLOR_BGR2RGB)
        img = Image.fromarray(frame_rgb)
        # キャンバスサイズに合わせてリサイズ
        cw = self.canvas.winfo_width() or 640
        ch = self.canvas.winfo_height() or 480
        if cw > 1 and ch > 1:
            img.thumbnail((cw, ch), Image.LANCZOS)
        self.canvas_img = ImageTk.PhotoImage(img)
        self.canvas.delete("all")
        self.canvas.create_image(cw // 2, ch // 2, image=self.canvas_img, anchor="center")
        # UI更新
        self.position_var.set(frame_idx)
        elapsed = frame_idx / self._fps
        total = self._total_frames / self._fps
        self.time_label.config(
            text=f"{self._fmt_time(elapsed)} / {self._fmt_time(total)}")
        self.frame_label.config(
            text=f"フレーム: {frame_idx}/{self._total_frames}")

    def _toggle_play(self):
        if not self._cap:
            messagebox.showinfo("情報", "動画ファイルを開いてください")
            return
        if self._playing:
            self._playing = False
            self.play_btn.config(text="▶")
            if self._after_id:
                self.root.after_cancel(self._after_id)
        else:
            self._playing = True
            self.play_btn.config(text="⏸")
            self._play_loop()

    def _play_loop(self):
        if not self._playing or not self._cap:
            return
        speed = float(self.speed_cb.get())
        delay_ms = max(1, int(1000 / (self._fps * speed)))

        if self._current_frame >= self._total_frames - 1:
            # 末尾に達したら停止
            self._playing = False
            self.play_btn.config(text="▶")
            return

        self._show_frame(self._current_frame + 1)
        self._after_id = self.root.after(delay_ms, self._play_loop)

    def _on_seek(self, value):
        if self._cap:
            frame = int(float(value))
            self._show_frame(frame)

    def _skip(self, seconds):
        if self._cap:
            frames = int(seconds * self._fps)
            new_frame = max(0, min(self._current_frame + frames, self._total_frames - 1))
            self._show_frame(new_frame)

    def _step_frame(self, delta):
        if self._cap:
            self._show_frame(self._current_frame + delta)

    def _stop(self):
        self._playing = False
        self.play_btn.config(text="▶")
        if self._after_id:
            self.root.after_cancel(self._after_id)
            self._after_id = None
        if self._cap:
            self._show_frame(0)

    def _fmt_time(self, seconds):
        m = int(seconds // 60)
        s = int(seconds % 60)
        return f"{m:02d}:{s:02d}"

    def _on_close(self):
        self._playing = False
        if self._after_id:
            self.root.after_cancel(self._after_id)
        if self._cap:
            self._cap.release()
        self.root.destroy()


if __name__ == "__main__":
    root = tk.Tk()
    app = App46(root)
    root.mainloop()
5. コード解説
動画プレイヤー UIのコードを、実際に書かれている実装に沿って解説します。
クラス設計とコンストラクタ
App46 クラスにアプリの全機能をまとめています(メソッド13個・全299行)。__init__ ではタイトル「動画プレイヤー UI」とウィンドウサイズ 860x640 を設定します。あわせて状態を保持する変数(self._cap・self._playing・self._total_frames・self._current_frame)を初期化し、最後に _build_ui() で画面を組み立てます。
※ 該当部分のコード本体は 「4. 完全なソースコード」 をご参照ください(重複表示を避けるため再掲を省略しています)。
ウィジェット構成
画面は tk.Frame×5・tk.Label×9・tk.Button×7・tk.Canvas・ttk.Scale×2・ttk.Combobox で構成しています。
※ 該当部分のコード本体は 「4. 完全なソースコード」 をご参照ください(重複表示を避けるため再掲を省略しています)。
イベント処理とボタンの接続
「📂 ファイルを開く」ボタン(_open_file())・「⏪」ボタン(_skip())・「▶」ボタン(_toggle_play())・「⏩」ボタン(_skip())・「⏹」ボタン(_stop())・「◀ 1f」ボタン(_step_frame())・「1f ▶」ボタン(_step_frame())を command= で接続しています。
※ 該当部分のコード本体は 「4. 完全なソースコード」 をご参照ください(重複表示を避けるため再掲を省略しています)。
例外処理
try-except で ImportError を捕捉しています。あわせて messagebox.showerror()・messagebox.showinfo() のダイアログで、ユーザーへの通知・確認を行います。
※ 該当部分のコード本体は 「4. 完全なソースコード」 をご参照ください(重複表示を避けるため再掲を省略しています)。
6. ステップバイステップガイド
このアプリをゼロから自分で作る手順を解説します。コードをコピーするだけでなく、実際に手順を追って自分で書いてみましょう。
-
1ファイルを作成する
新しいファイルを作成して app46.py と保存します。外部ライブラリ
PIL・cv2を使います。先にpip install Pillow opencv-pythonを実行してください。(import 名と pip のパッケージ名が異なる点に注意:PILはPillow・cv2はopencv-pythonでインストールします) -
2クラスの骨格を作る
App46クラスを定義し、__init__と、末尾のroot = tk.Tk()~mainloop()の最小構成を書いて、まず空のウィンドウが出ることを確認します。 -
3ウィンドウを設定する
title("動画プレイヤー UI")・geometry("860x640")・configure(bg="#1a1a2e")をコンストラクタで設定します。 -
4画面部品を並べる
_build_ui()の中で、tk.Frame×5・tk.Label×9・tk.Button×7・tk.Canvas・ttk.Scale×2・ttk.Comboboxを作って配置します(掲載コードと同じ並び順で書くとレイアウトが一致します)。まず表示だけ確認しましょう。 -
5イベントを接続する
「2. 機能一覧」で挙げた各ボタンを
command=で対応するメソッド(_open_file()・_skip()・_toggle_play()・_skip()・_stop()・_step_frame()・_step_frame())につなぎます。 -
6中心になるメソッドを実装する
アプリの本体である
_play_loop()(14行)・_toggle_play()(13行)・_stop()(8行)など を実装します。 -
7動作確認する
python app46.pyで起動し、各ボタンが反応することを確認します。
7. カスタマイズアイデア
基本機能を習得したら、以下のカスタマイズに挑戦してみましょう。少しずつ機能を追加することで、Pythonのスキルが飛躍的に向上します。
💡 ダークモードを追加する
bg色・fg色を辞書で管理し、ボタン1つでダークモード・ライトモードを切り替えられるようにしましょう。
💡 結果をファイルに保存する
このコードに保存処理はないため、表示中の数値や結果はアプリを閉じると消えます。テキストファイルへ書き出して、次回起動時に読み込む機能を追加してみましょう。
💡 配色をまとめて管理する
背景色 #1a1a2e をはじめ、色コードが各所に直書きされています。色を1つの辞書にまとめると、テーマの切り替えが1か所の変更で済むようになります。
8. よくある問題と解決法
❌ 文字のフォントが崩れる・見た目が違う
原因:このコードは font=("Noto Sans JP", ...) のようにフォント名を直接指定しています。環境にこのフォントが入っていないと、OS が代わりのフォントで表示するため、見本と見た目が変わることがあります。
解決法:動作には支障ありません。気になる場合は font 引数の名前を自分の OS に入っているフォントへ書き換えるか、font 引数を省略してください。
❌ ウィンドウの大きさが画面に合わない
原因:geometry("860x640") の固定サイズで起動するためです。
解決法:この数値を書き換えて起動サイズを調整してください。なお、このコードにはウィンドウサイズを固定する設定(resizable の指定)が無いため、ウィンドウの端をドラッグしたサイズ変更は既定どおり可能です。
9. 練習問題
アプリの理解を深めるための練習問題です。難易度順に挑戦してみてください。
-
課題1:機能拡張
動画プレイヤー UIに新しい機能を1つ追加してみましょう。どんな機能があると便利か考えてから実装してください。
-
課題2:UIの改善
色・フォント・レイアウトを変更して、より使いやすいUIにカスタマイズしてみましょう。
-
課題3:保存機能の追加
入力値や計算結果をファイルに保存する機能を追加しましょう。jsonやcsvモジュールを使います。
写経中に赤いエラー文が出たら、Pythonエラー一覧&解決法(英語メッセージ逆引き)で原因と直し方をすぐ確認できます。
このレベルのアプリが作れたら、入門書の次の「作るための本」へ進む時期です。実践におすすめのPython本(当サイトの参考書ランキング総合3〜4位)で自動化とコードの書き方の2冊を、その直後の用途別専門書の節でデータ分析・Web・AIの本を比較しています。